Configure a webhook endpoint
Webhook endpoints are managed in the Merchant Portal.
- Go to Developer → Webhooks → Endpoints.
- Select Add endpoint.
- Enter the HTTPS URL that will receive webhook requests, for example
https://example.com/webhook. HTTP destinations are not accepted. - Optionally add a description to help identify the destination.
- Select one or more event types. Leave every event type unselected to receive all available event types.
- Select Save.
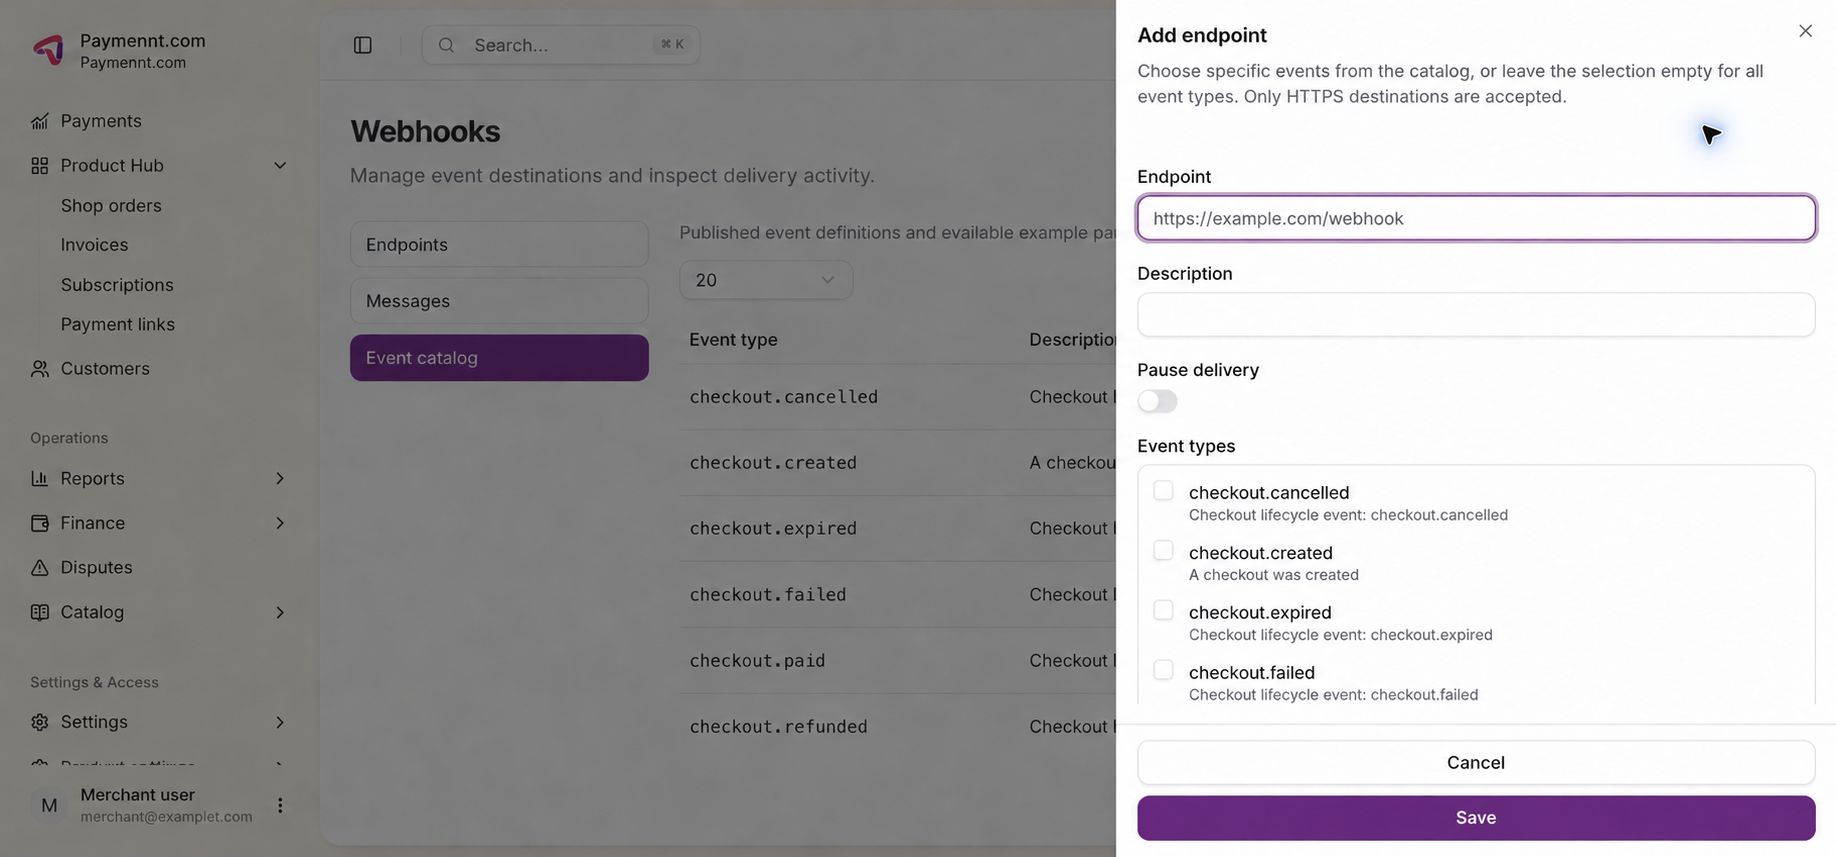
An endpoint can be created in a paused state. Paused endpoints retain their configuration but do not receive deliveries until resumed.
Manage an endpoint
Open an endpoint from the Endpoints list to view its status and configuration. From its Settings tab, you can:
- Edit its destination URL and description.
- Pause or resume delivery.
- Reveal its signing secret when configuring the receiving service.
- Rotate the signing secret.
- Delete the endpoint.
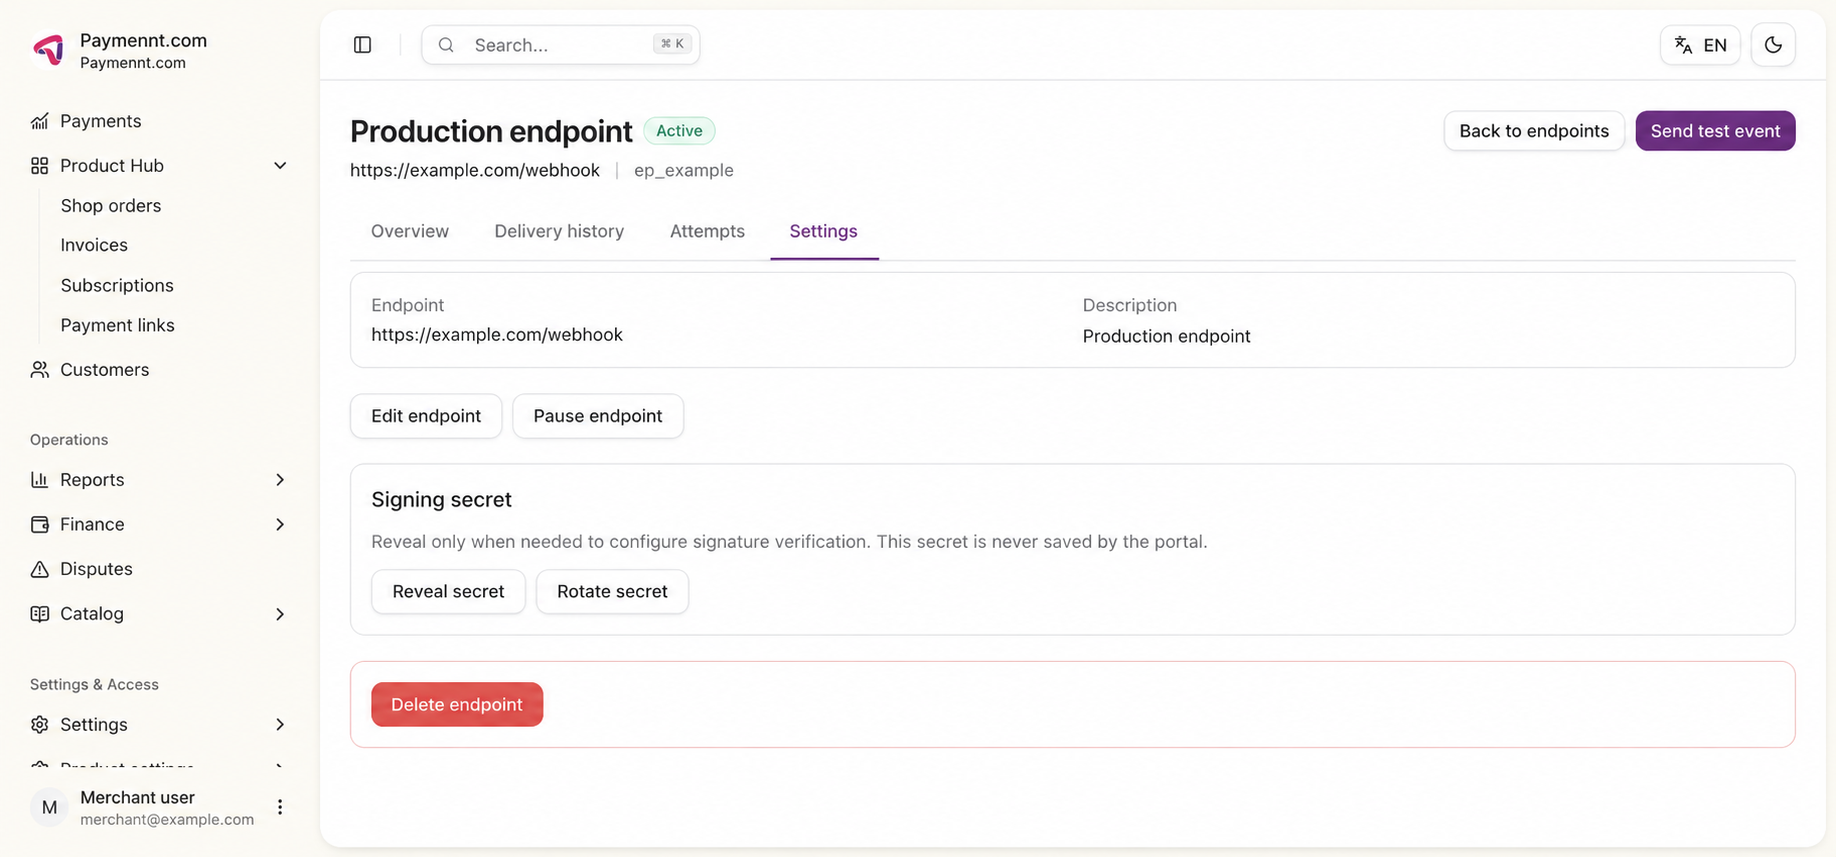
Treat the signing secret as a credential. Store it only in your server-side secret manager. The Merchant Portal does not retain a revealed copy, so record it when you reveal or rotate it.
Verify incoming webhooks
Verify every incoming request before processing its payload. Configure your receiver with the endpoint's signing secret, preserve the unmodified raw request body, and validate the signing headers before JSON parsing.
See Verify webhook signatures for the header contract, a manual HMAC verification example, timestamp validation, and common failure modes. Do not accept a webhook merely because it originates from a known IP address or has a familiar event type.
Receiver requirements
Your receiver should:
- Accept HTTPS requests and return a successful response only after it has safely accepted the event.
- Handle the same event more than once without duplicating a business action.
- Process events independently; delivery order must not be relied on.
- Record the event ID and outcome so failed processing can be diagnosed.